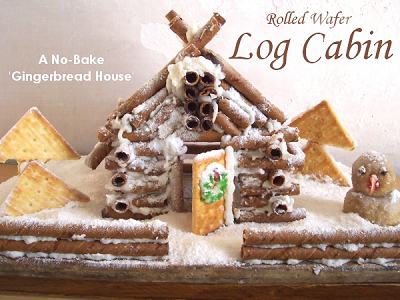
Wafer Roll Log Cabin – No Bake ‘Gingerbread’ House
Create a charming log-cabin set amidst a breath-taking winter scene to sit atop your Christmas table made with rolled wafers without the use of an oven.
You Will Need:
• A base to create your log cabin upon
• A box of rolled chocolate wafers
• Butter and Sugar for the ‘cementing’ icing and for sprinkling over as ‘snow’
• Crackers for trees and door
• Some kneaded dough (any flour) for the snowman
How To:
1. Start by making the ‘cement’ icing. You will need a thick buttercream icing for this purpose that holds your ‘logs’ together.
Ingredients:
1/2 cup white shortening
3-1/2 cups powered sugar
1 teaspoon vanilla (use clear vanilla to avoid discoloring frosting)
1/4 teaspoon almond or coconut extract
3-4 tablespoons milk or hot water
Directions:
 1. Beat shortening and flavoring for about one minute, then slowly add half of the sugar, mixing in well. Add half of the milk or water and mix well. Gradually beat in the rest of the sugar and just enough milk or water to reach the desired consistency, whether for piping or spreading.
2. Fit a writing nozzle to a pastry bag and fill the bag with the prepared icing. Now are ready for some fun.
3. Choose a base on which you would like to create your log cabin and get started. We chose a rectangular chopping board. You can also choose a large plate, a tray, cardboard etc.
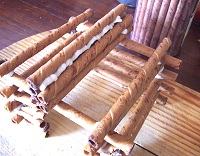 4. Start forming your log cabin. First build a square base as shown. Pipe out icing in a straight horizontal line at the back and place a rolled wafer over it. Place two pieces of wafers for the front wall leaving space in between for the door. Again, ‘glue’ them to the base with icing. Use a lot of icing. This will ensure the wafers stay in place and will give a ‘snowy’ look to your creation.
Now pipe out icing on the two edges of the glued wafers for the vertical wafer to be placed over them. Continue on the other side and keep building the cabin till you reach a good height. This will take 6 lines of wafers on each side approximately.
|
Making the Trees |
   |
5. When the square base is done, start with the roof. For the roof, glue together a cluster of wafers in the top center of the walled structure that you have created. For this, glue two wafers side by side in the center. Add another two on top of these and yet another two to finish. See image.
6. Now break some wafers into two halves in a sawing motion. You might damage some wafers in the process but one box of wafers will provide easily for the cabin plus the wastage.
7. Cement the halved wafers in a slanting position from the last wafer on the walls to the roof height you just created, alternating one log on each side – left and right. The logs will criss-cross at the top giving the cottage a pretty look.
8. You will some space right above the door. Fill it up with smaller wafer pieces from the breakage. Make a fence using a double row of wafers all around the edge of your base.
9. The icing will dry quickly and set all your wafers together. When you are done, pipe out some icing in between the logs (especially where there are spaces between them for some extra cementing and also to give the cabin a snow-covered look.
10. Refrigerate or if you have space, freeze the cabin while you prepare the trees and snowman.
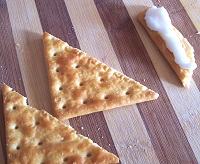
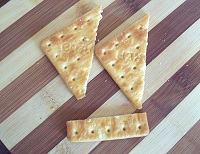
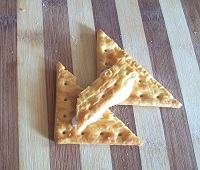
11. For the trees, you will need any square crackers. Cut out pieces as shown. Pipe out icing on the strip and place the two triangles on it.
12. Prepare a snowman from any left-over dough or marzipan that you have. Give him two ‘clove’ eyes, a little ‘carrot slice’ nose and candied cherry mouth.
13. Prepare a door with a rectangular piece of the same crackers. Pipe out icing in a circle to form the wreath and glue chopped candied fruit in green color over it with a small dot of red for the bow.
14. Cement the trees and door to the base and sprinkle lots of powdered sugar over the base, fence, cabin, snowman, trees etc. to cover them in snow.
This article first appeared in the ‘Celebrating Christmas PDF Magazine‘ which is a FREE magazine that you can download and even print out.

